How to Setup Outlook 2013 to Check Your Email
In this tutorial we will show you how to setup MS Outlook 2013 to check your email. Outlook 2013 is an email client that can send and receive e-mail from your personal computer.
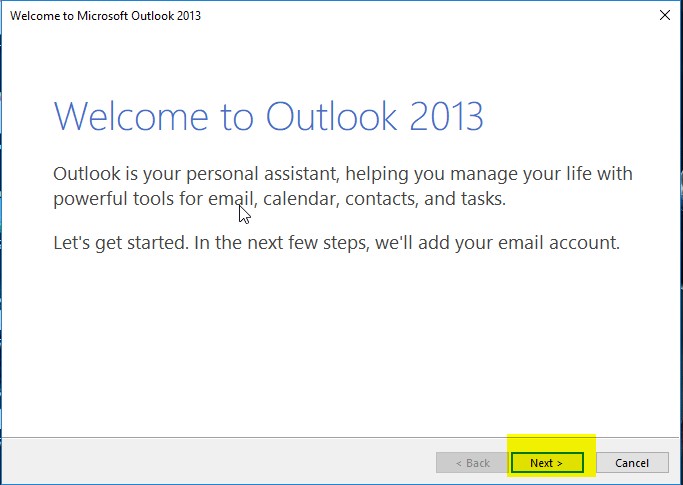
1. When you first open Outlook, it will provide a “Welcome to Outlook 2013” message, click the Next button.
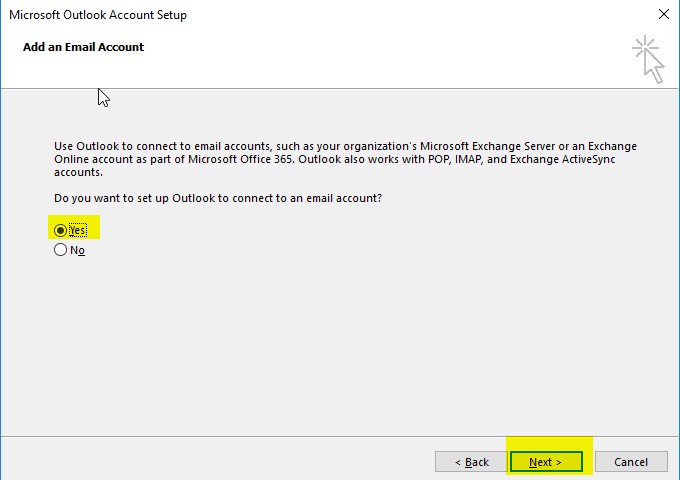
2. The next screen will ask “Do you want to set up Outlook to connect to an email account?” choose Yes and click the Next button.
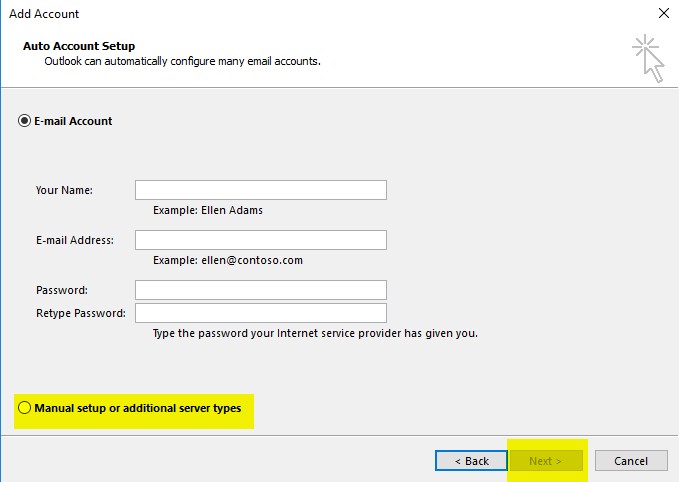
3. On the Auto Account Setup menu, select the option for Manual setup or additional server types, then click Next.
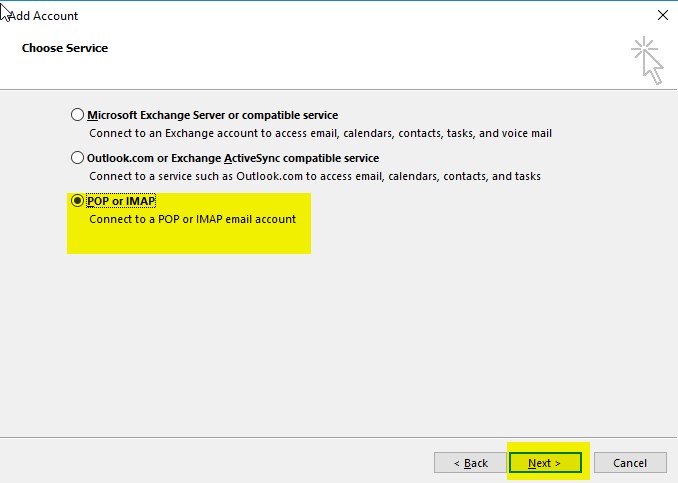
4. On the Choose Service menu, click the POP or IMAP option then click the Next button.
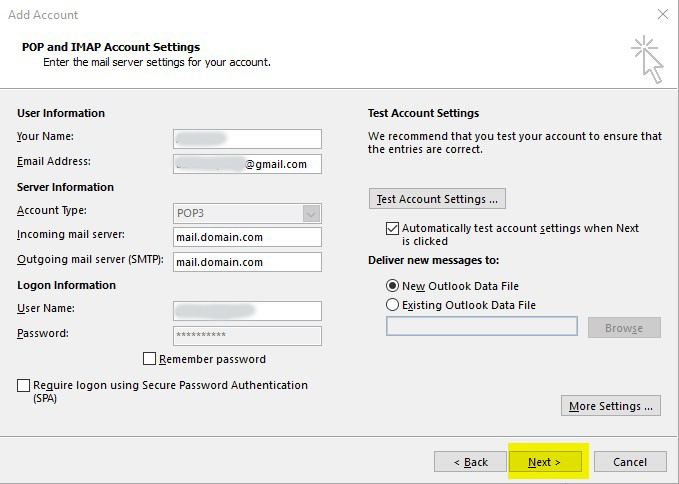
5. You will then see the POP and IMAP Account Settings menu, fill in the fields.
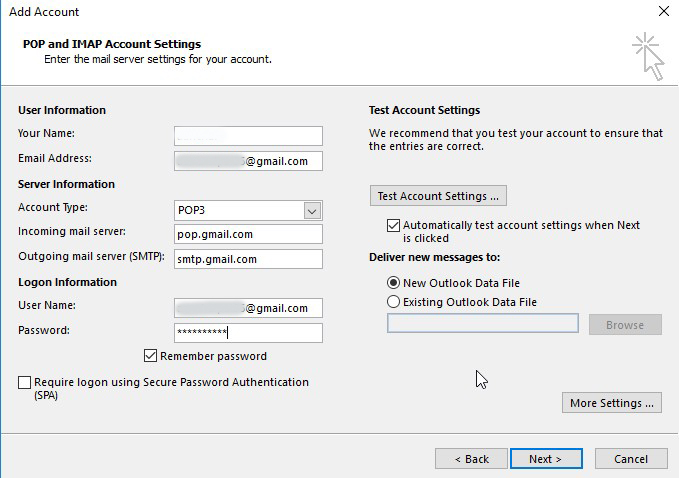
Below is a description of the fields:
| Option | Description |
|---|---|
| Your Name | Enter the name you want people you email to see, such as: Venkat Reddy |
| Email Address | Enter your full email address, such as: username@example.com |
| Account Type | Choose if you want to use POP or IMAP. By default, POP downloads and removes your emails from the server, while IMAP leaves them on the server. Here is a link to an article that explains the differences in more detail. In my tests, I am setting up a POP account. |
| Incoming mail server |
Standard settings: mail.domain.com (Replace domain.com with your actual domain)
SSL Settings: secureXX.onlinetroubleshooters.com (Replace the XX with the numbers from your server name)
|
| Outgoing mail server (SMTP) | Standard settings: mail.domain.com (Replace domain.com with your actual domain)
SSL Settings: secureXX.onlinetroubleshooters.com (Replace the XX with the numbers from your server name)
|
| User Name | Enter your full email address, such as: username@example.com |
| Password | Enter the password you for this email address. |
| Remember password | I recommend checking this box, so Outlook will save your password. |
| Require logon using Secure Password Authentication | Do not check this box. |
6. Click the More Settings button.
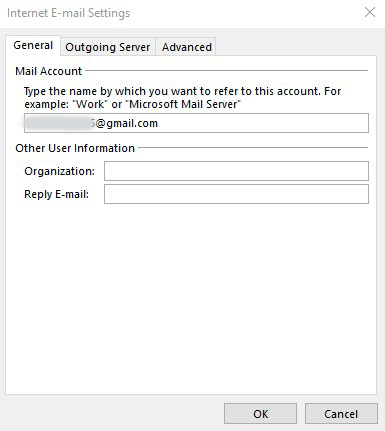
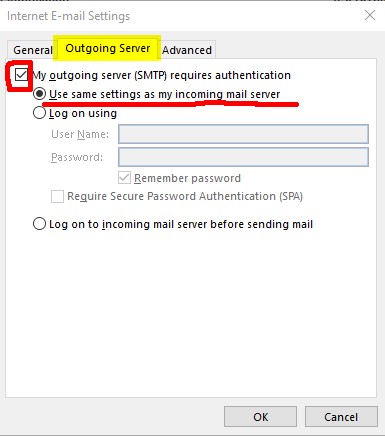
7. Click the Outgoing Server tab.
Check “My outgoing server (SMTP) requires authentication“.
Check “Use same settings as my incoming mail server“.
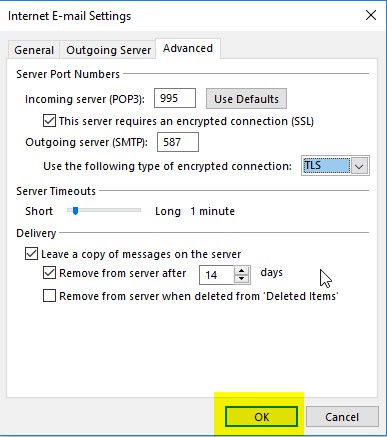
8. Click the Advanced tab. Enter your settings, below is a description of the available options.
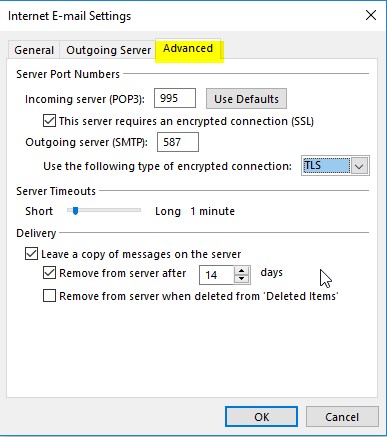
| Option | Description |
|---|---|
| Incoming Server |
Choose your preferred settings, below are the available options.
Standard (POP3): 110
Standard (IMAP[divider style=”line”]): 143
SSL (POP3): 995
SSL (IMAP): 993
|
| This server requires an encrypted connection (SSL) | Click this if you are using the SSL option. |
| Outgoing Server |
Standard: 25* or 587
SSL: 465
*Often times, ISP’s will block this port for use with their email. You may want to consider using port 587, or the secure settings.
|
| Use the following type of encrypted connection: |
Standard: None
SSL: SSL
|
9. Click the OK button.
10. Click the Next button, Outlook will test the the account settings.
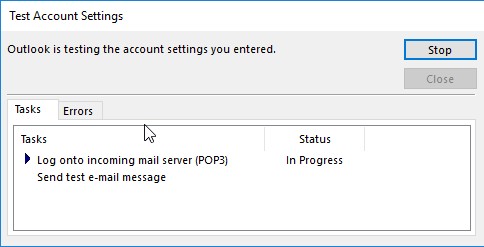
11. You will see two tasks: Log onto incoming mail server, and, Send test e-mail message. When they are complete, Close button.



14 Responses
3mauritania
gay chat roullete https://bjsgaychatroom.info/
best gay dating apps https://gaypridee.com/
rastaboy gay chat https://gaytgpost.com/
gay dating aps https://speedgaydate.com/
vegas slots https://candylandslotmachine.com/
clearwater slots https://pennyslotmachines.org/
pompeii slots https://beat-slot-machines.com/
luckyland slots https://www-slotmachines.com/
gsn casino free slots https://slotmachinegameinfo.com/
dissertation defense powerpoint https://dissertationwriting-service.com/
dissertation abstracts international https://mydissertationwritinghelp.com/
doctoral dissertation help history https://dissertations-writing.org/
dissertation in practice https://helpon-doctoral-dissertations.net/